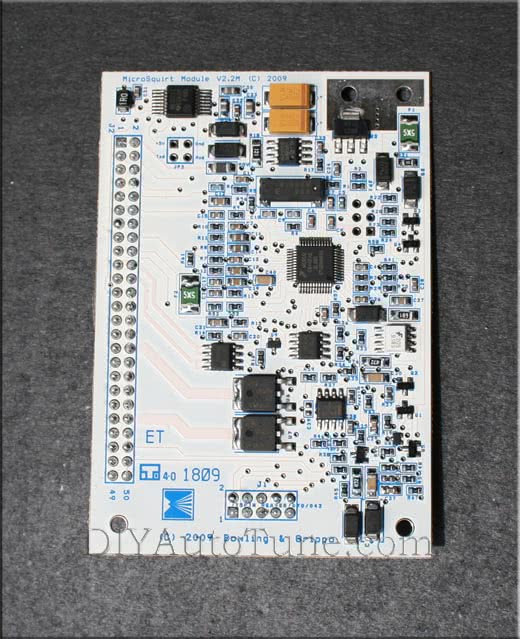
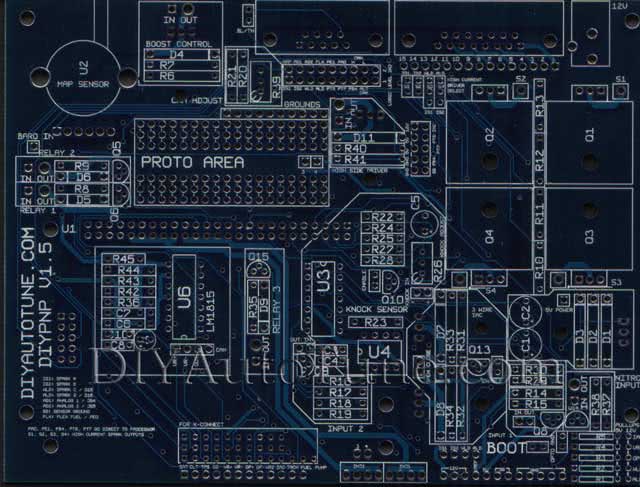
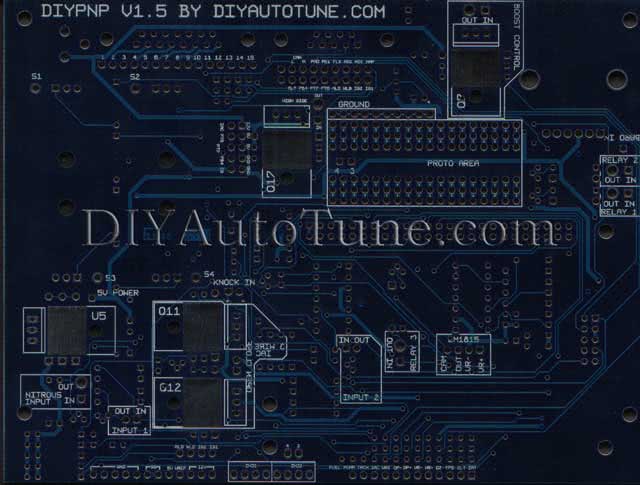
The DIYPNP board lets you build your own plug and play engine management systems. The core of the DIYPNP kit is a MicroSquirt module that plugs into an expansion ‘mainboard’ with on board circuits for many features, including direct coil control, boost control, knock control, and several general purpose inputs and outputs. You assemble this board and jumper it to a ‘connector board’ which includes a connector to plug into your existing wiring harness. Now you no longer have to solder together awkward adapter harnesses, or hack up a factory ECU case to get a build-it-yourself, plug and play MegaSquirt ECU.
Note that for the purposes of this documentation most of these directions assume you will be running MS2/Extra code, version 2.1.0 or higher.
Some boards have extra components on the adapter board that you may want to assemble as well. See these pages for adapter boards with special components.
- Nippondenso 52 pin: stepper driver
- Delphi 56 pin: stepper driver
- Ford 60 pin: TFI output
- Bosch 55 pin: Two extra spark outputs
If you have an older V1.1 board (marked “DIYPNP V1.1 BY DIYAUTOTUNE.COM” on the upper edge of the underside of the board), see the V1.1 assembly documents.
We recommend using 63/37 tin/lead solder. Lead free solder is not as reliable or easy to use, and automotive parts are ROHS exempt anyway.
Overview
First, let’s go over the features. At the core of the board is a MicroSquirt Module board. This includes the processor, many of the sensor conditioners, and two injector drivers, each injector driver capable of running one low impedance or four high impedance injectors.

The main board that the MicroSquirt Module bolts to adds several new circuits of its own to provide you with all the features you need to run many popular engines, and room to add more circuits if you need something not originally on the board. We’ve packed even more features into the V1.5 DIYPNP main board, including 3 wire IAC control, 12 volt input and output, an extra relay control, and more.

Since the MicroSquirt does not have an onboard MAP sensor, we have added a MAP sensor in the upper left hand corner. The kit ships with a 2.5 bar sensor, which can be upgraded to our MapDaddy 4 bar sensor with barometric correction for high boost engines and real time altitude correction. Other circuits include:
Below the MAP sensor, there are two relay control outputs. These can be used for fan control, variable intake solenoids, nitrous output, or other low current draw, on/off applications. Each has a maximum current of 1 amp. They can also be jumpered to work with ground triggered ignition modules. The boost control transistor provides PWM control for boost control solenoids. A third relay control output sits under the module.
We’ve added a cam sensor adjustment space below the boost control. This allows you to change the triggering threshold of the VR2 circuit with either fixed resistors or a trim pot.
There are three connectors at the top of the DIYPNP board. The DB9 allows you to connect a regular serial cable to plug the DIYPNP into your laptop; the “BL/TH” jumper allows you to send 5 volts to pin 9 to power Bluetooth or wireless RS232 adapters. The DB15 connector is for adding additional circuits not included in a factory wiring harness. Note that the top row of pins has somewhat thicker traces; if you are going to be running spark control or boost control out the DB15, we recommend using the upper row of pins. Lastly, we’ve provided a 12 volt jack that allows you to power the DIYPNP without plugging it into your wiring harness. This can be useful for both diagnostics and loading firmware to the unit.
The high side driver located next to the DB9 connector can power 12 volt relays or solenoids that need voltage instead of ground. It has a maximum output current of 5 amps. This can be used with Honda VTEC solenoids, GM fuel pump relays, and other devices that need power from the ECU.
You can add up to four BIP373 transistors for direct coil control. Each can drive a single coil, allowing for wasted spark on a V8 or coil per plug ignition on a four cylinder. Each BIP373 is provided with its own heat sink, removing the need for mica insulators. There is a jumper to allow using the standard MicroSquirt ignition input or to allow you to switch to a different input circuit if needed. The output connections are numbered S1 through S4. One BIP373 is included as standard equipment on the Bosch 55 pin version; on other DIYPNP models, these are sold separately.
We’ve put a separate 5 volt power supply on the DIYPNP main board that can be used to power 5 volt circuits. Noise in this power circuit will not affect the processor or cause resets. It can supply up to 500 mA of current. It’s use is purely optional in the event you’re adding additional functionality and either need the additional power capacity or need a ‘dirty’ power source, separate from the 5v source used by the processor which must be kept clean.
There are five spots for pull-up resistors in the lower right hand corner of the board. They allow you to apply a 5 or 12 volt pull up to several inputs and outputs, in order to accommodate different ignition control and output setups.
The circuits marked Input 1 and Input 2 are general purpose on/off inputs, with a buffer circuit to protect the processor. They are designed for ground triggered inputs, but with some protection for the processor if you accidentally connect them to 12 volts. The output is 5 volts when the input wire is disconnected, 0 volts when the input signal is pulled to ground. These can be used for launch control or table switching. The V1.5 board adds a 12 volt input that is used with the MS2/Extra nitrous control circuit and can also be used for other features like launch control.
The 3 wire IAC driver next to the power supply converts the signal from the IAC output into one that alternately drives an opening and closing coil of certain idle control valves. This is used on many BMW, Subaru, and Toyota applications.
We have put a basic knock control circuit in the center of the board. This is an untuned knock input circuit that normally puts out a 5 volt signal. When it detects knock, it pulls the signal to 0 volts for 0.4 seconds. The trim pot allows you to tune its sensitivity.
The V1.5 board adds an LM1815 VR conditioner for certain crankshaft and camshaft position sensor designs.
The board has several sets of headers, most of which are clustered around the lower edge or near the proto area at the top of the board. Generally, the ones at the lower edge are intended for jumpers to the adapter board, while the ones in the center are for connections to the circuits inside the board. Here are the headers and what their pins do.
Edge connections:
- IAT – Intake air temperature sensor input
- CLT – Coolant temperature sensor input
- TPS SIG – Throttle position sensor signal
- O2 SENSOR – Oxygen sensor input
- VR IN – and VR IN + – Input for a variable reluctor crankshaft position sensor
- OPTO IN – and OPTO IN + – Input for a Hall effect or optical crankshaft position sensor
- VR2 IN + – Input for a camshaft position sensor.
- IAC – Output for a 2 wire idle air control valve.
- TACH OUT – 12 volt tach drive output.
- FUEL PUMP – Signal to drive a fuel pump relay.
- INJ 1 and INJ 2 – Each of these headers has four connections and can drive four high impedance injectors.
- 12V – Use these connections to supply 12 volt power to the board.
- VREF – 5 volt reference voltage for sensors.
- 5V – 5 volt power voltage from the main board voltage regulator. Do not connect to any point marked VREF on the main board or to external analog sensors.
- SG – Signal ground, for sensor returns.
- GND – Power ground.
- IGN1 and IGN2 – Logic level ignition outputs.
- WLED – Warm up LED output, which can be used as the 3rd spark output or as a relay control.
- ALED – Acceleration LED, which can be used as the 4th spark output or as a relay control.
- OPTO GND – Connecting this jumper connects the negative optical input terminal to ground.
18 pin center header:
- IG1 – Logic level spark output 1.
- IG2 – Logic level spark output 2.
- WLD – Warm up LED output, which can be used as the 3rd spark output or as a relay control.
- ALD – Acceleration LED, which can be used as the 4th spark output or as a relay control.
- PT6 – General purpose output port, equivalent to IAC1 on a MS2. Can be used for general purpose outputs, boost control, or nitrous output stage 1.
- PT7 – General purpose output port, equivalent to IAC2 on a MS2. Can be used for general purpose outputs, boost control, or nitrous output stage 2.
- PIB4 – On a full sized MS2, used to control a stepper chip. Useful if you are building a stepper IAC circuit in the proto area.
- ALTCAM – Use for adjusting the VR2 circuit sensitivity. Pulling this voltage up or down changes the trigger threshold.
- MAP – Manifold absolute pressure input, used if not using the onboard MAP sensor.
- ADC1 – Analog to digital input 1. The knock input circuit connects to this one, or can be used for a second O2 sensor, launch control, or nitrous input. Older firmware versions call this JS5.
- ADC2 – Analog to digital input 2. The baro correction pin near the MAP sensor connects here. Other uses include a second O2 input, launch contro1, or nitrous input. Older code versions call this JS4.
- FLEX – Flex fuel input. Connects to PE0 on the processor, and can be used for flex fuel sensors or launch control.
- PA0 – Equivalent to JS11 on a MS2. Can be used for launch control input, a general purpose output, or boost control.
- CANH and CANL – Connections for CANBUS output.
- LOGIC LEVEL INJ – We’ve brought the injector driver signals out as 5 volt logic level signals for peak and hold devices or other alternate injection drivers.
10 pin center header (handy for the plug-in upgrade modules):
Potential uses for this header are for an IAC Stepper Board, or a 4-cyl Sequential Fuel Injection Upgrade Module.
- 12V – 12v Power Supply for upgrade modules using this header.
- VREF – 5 volt reference voltage for sensors.
- 5V – 5 volt power voltage from the main board voltage regulator. Do not connect to any point marked VREF on the main board or to external analog sensors.
- GND – Power ground.
- IAC – Output for a 2 wire idle air control valve.
- PT6 – General purpose output port, equivalent to IAC1 on a MS2. Can be used for general purpose outputs, boost control, or nitrous output stage 1.
- PT7 – General purpose output port, equivalent to IAC2 on a MS2. Can be used for general purpose outputs, boost control, or nitrous output stage 2.
- PIB4 – On a full sized MS2, used to control a stepper chip. Useful if you are building a stepper IAC circuit in the proto area.
- SG – Signal ground, for sensor returns.
Further Reading
These documents cover how to assemble the DIYPNP. Here are links to more information about this system.
- Check out the DIYPNP Models Page to see if we have a jumper guide and base map for your vehicle.
- We recommend MS2/Extra firmware for the DIYPNP. Click here for complete MS2/Extra documentation.
- Looking for tuning instructions, or how to get your DIYPNP to crank up and run? See the MS2/Extra Tuning Manual.
- See the MicroSquirt Module Page for complete information on the MicroSquirt Module card that forms the core of the DIYPNP.
- See more helpful MegaSquirt tech information on our Tech Articles page.
